
First of all, get comfortable, get your chocolate and your coffee, this can take a while!

Right. Let’s get started! First of all you need all the usuals: Sharp pencil, Ruler, set square, drawing board.

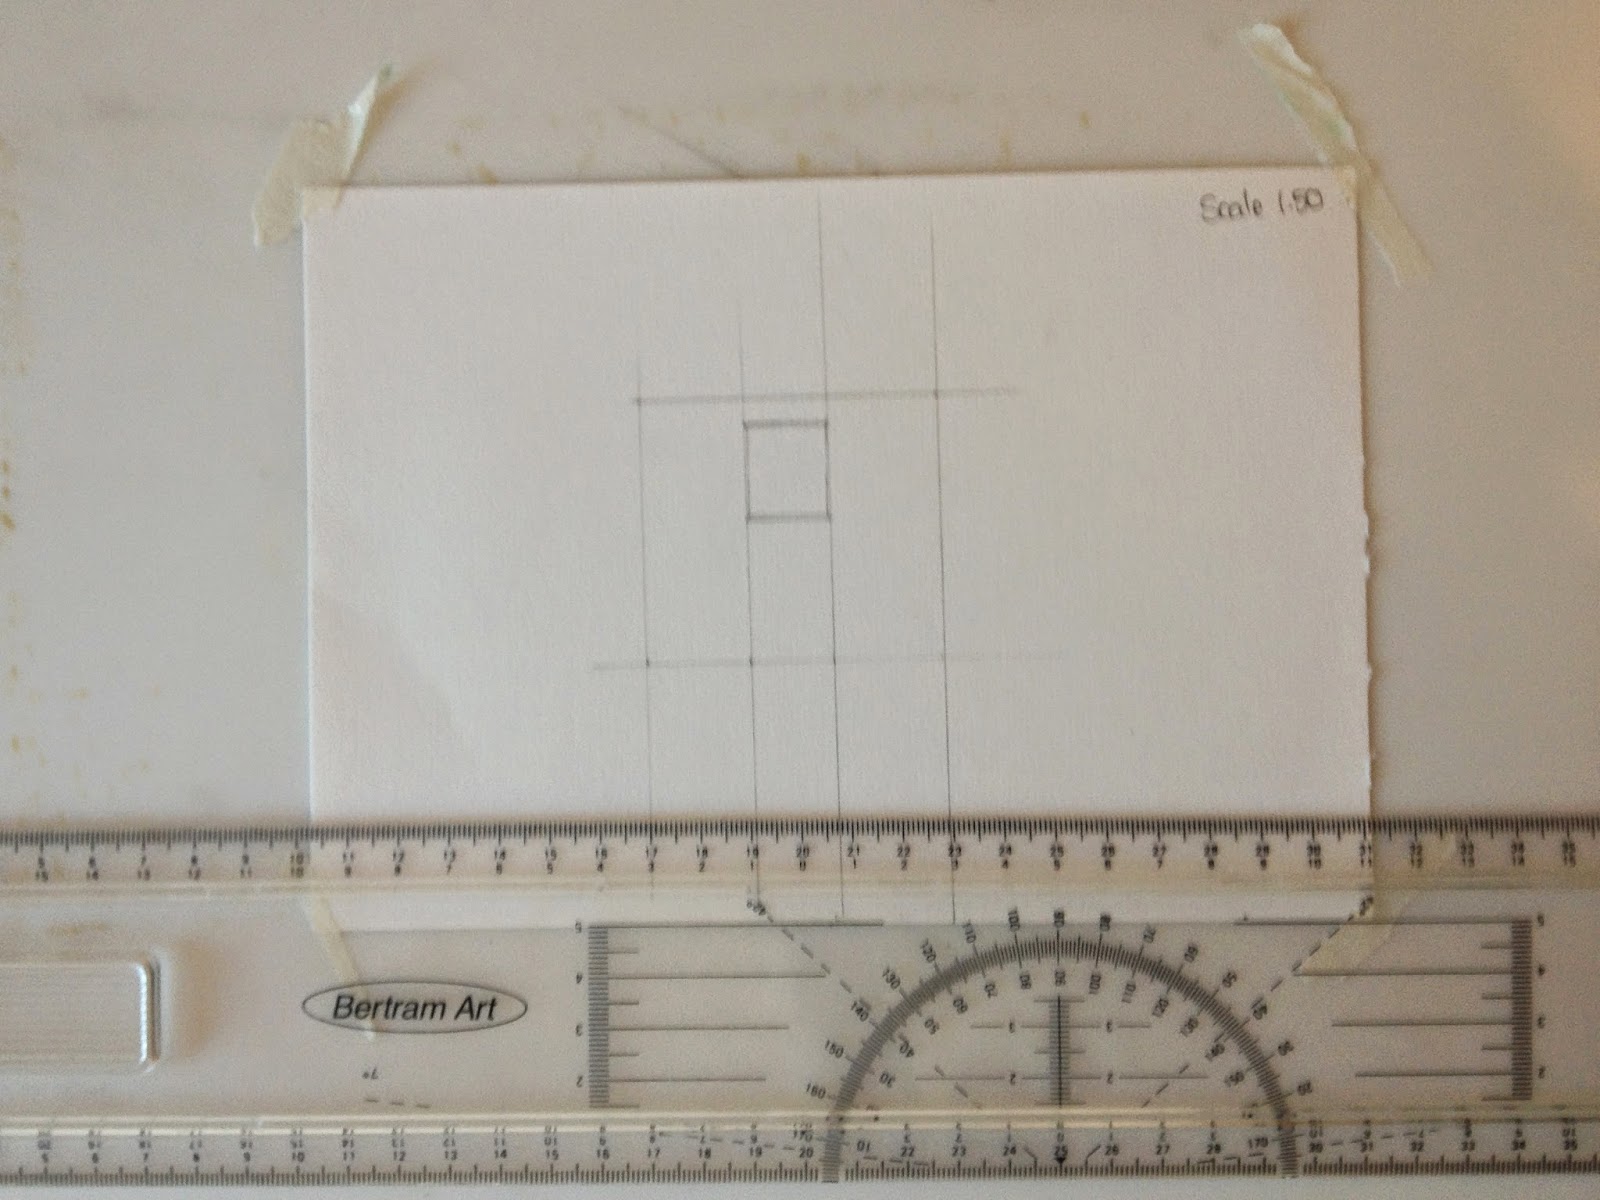
Use masking tape to fix your paper to your drawing board (or you can fix it to your desk if you don’t have a drawing board.) Draw the elevation of the main wall you want to show. I chose to scale it at 1:50, but as long as its to scale it doesn’t matter which scale you choose.
Next set your vanishing point, and draw lines from the vanishing point to the corners of the walls, this will give you the basic shape of the room in perspective.
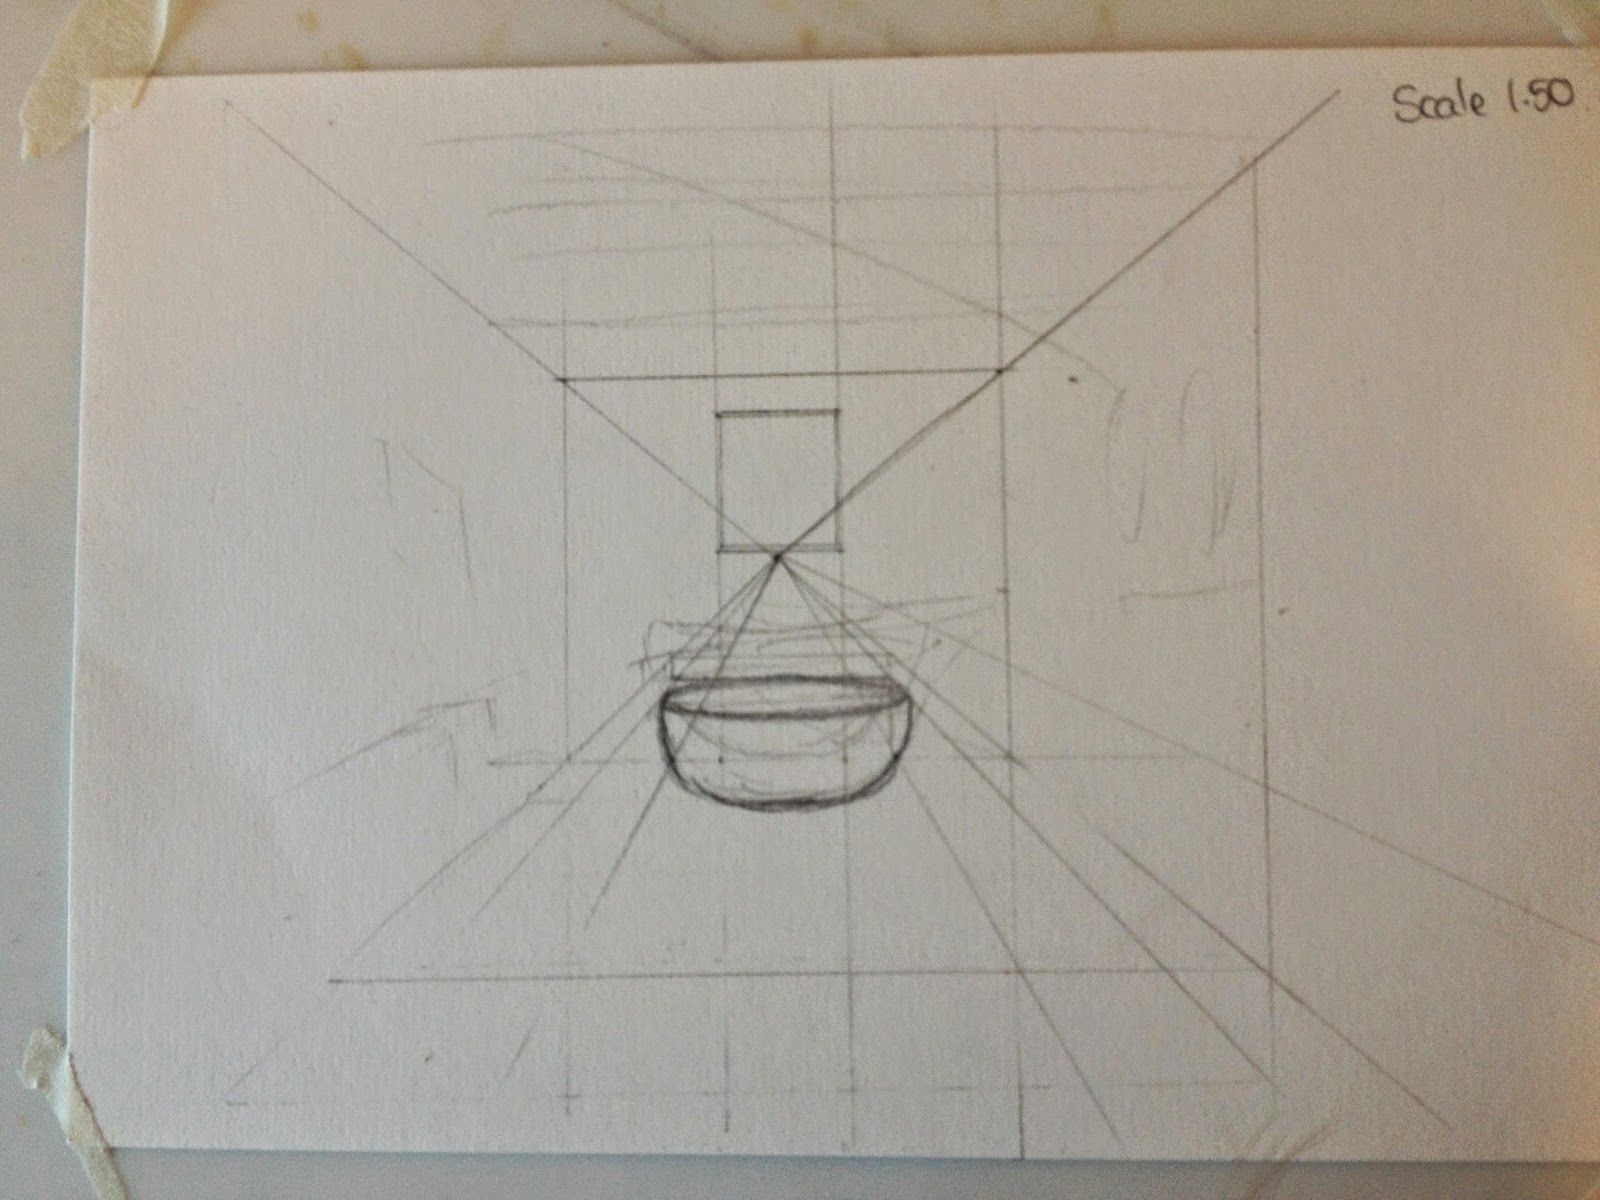
To draw the objects in the foreground you need to first draw them to scale on the back wall, and then draw lines from the vanishing point and extend them through the corners of your object. This will give you a line to follow and you and then you can bring the object to the foreground at the correct scale.
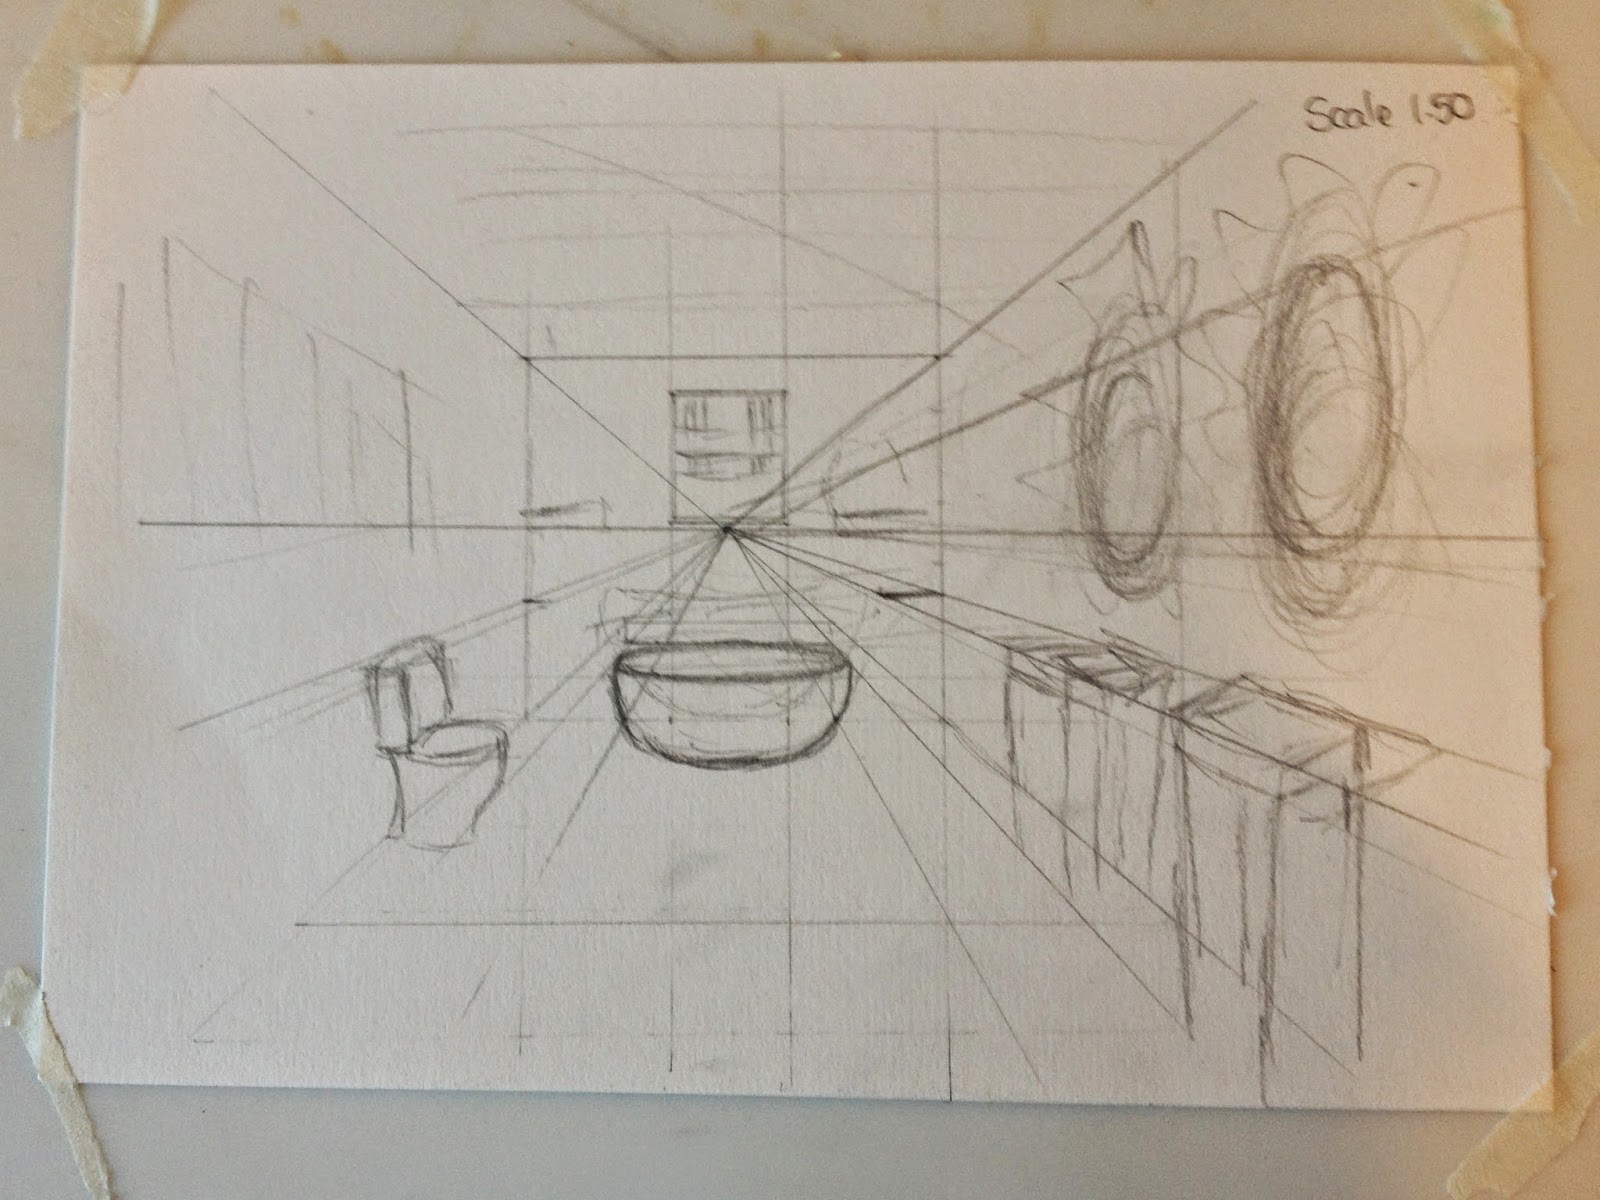
I normally do a rough sketch of where I want the objects to be, before using an eraser to clear up the drawing and do it nicely

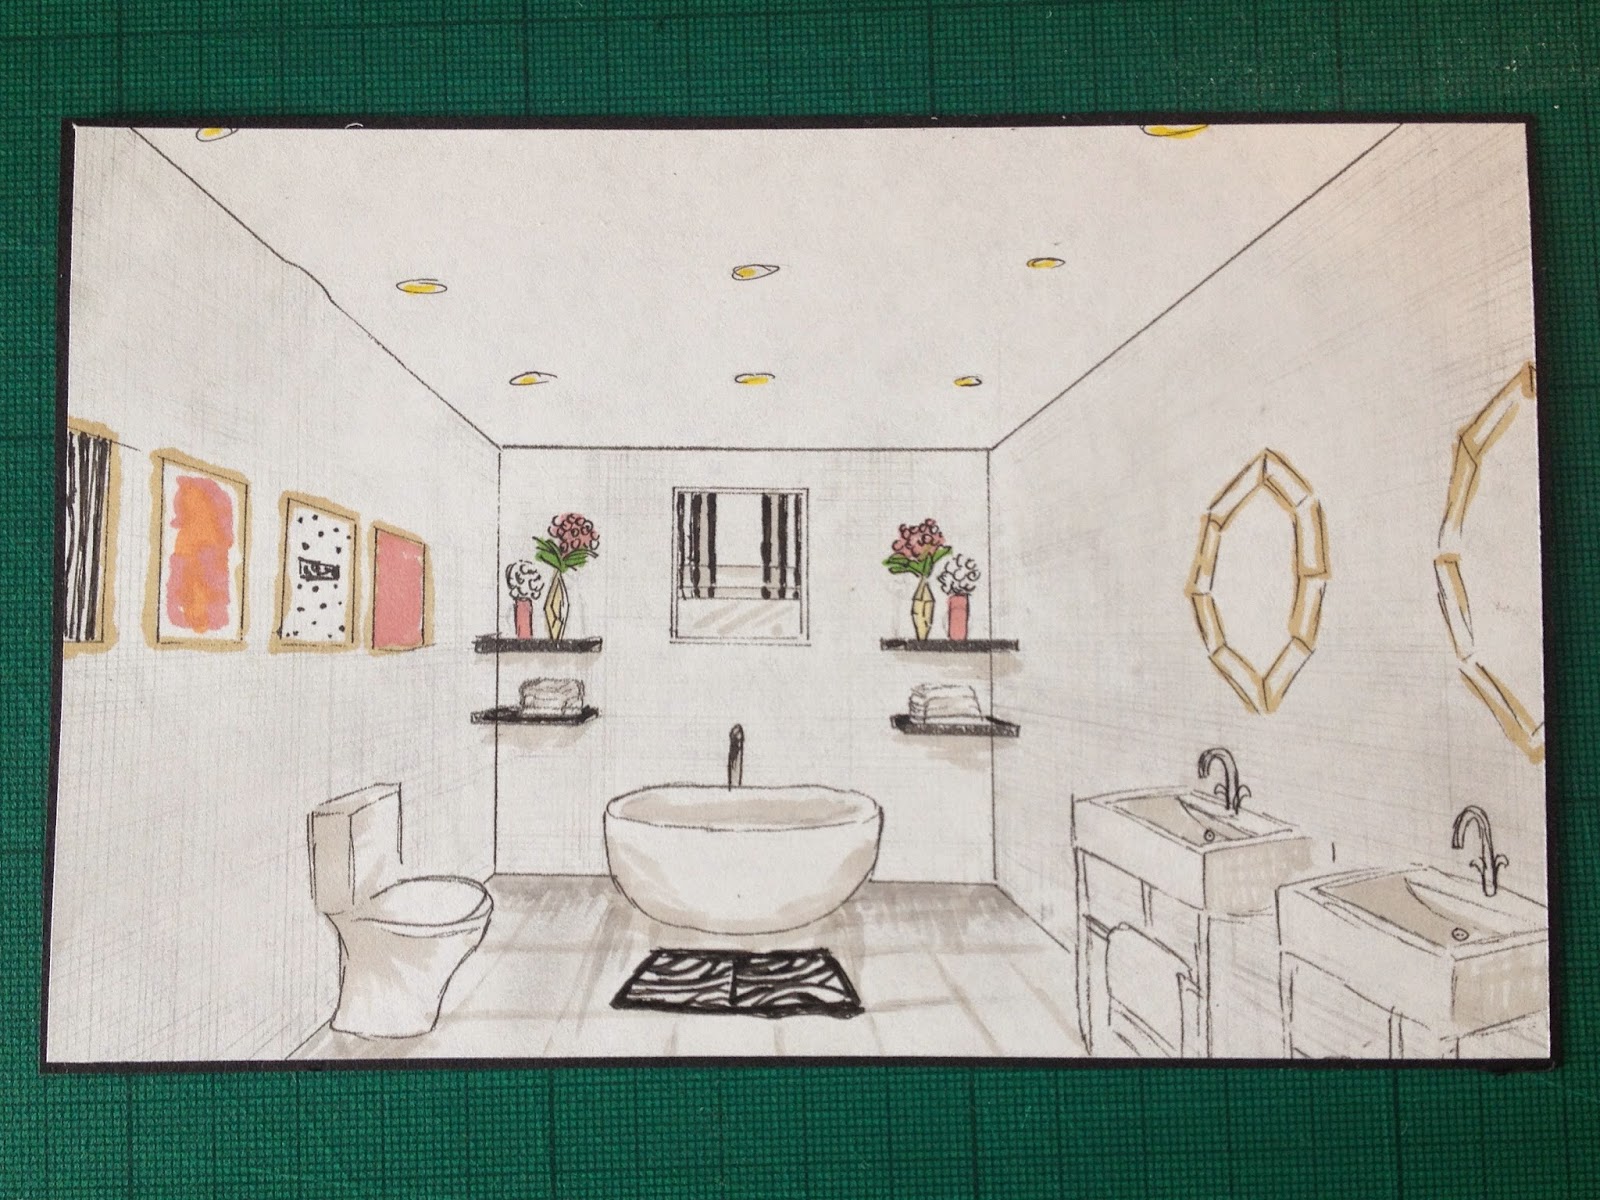
Now you can rub out the lines from the vanishing point, as you don’t need them anymore.

And then trace over the pencil lines with a drawing pen.

And then comes the best part- Rendering, Yay!! I used Letraset markers to render this, as well as a pencil for the tiny mosaic wall tiles.
I hope you like it! Let me know if you have any questions!
Lots of love,
Emily

Leave a Reply